Christmas in my painted house
I know I am a bit late this year (OK, very late). But I’m amazed that we’ve even got this far. The living room still smells of fresh paint, the fireplace scares with its bareness, and we pretend that the splashes of paint on the floor are actually snowflakes in the room.
I didn’t go fully on this year with all the Christmas stuff but at least we have a real tree (always real), fairy lights and of course some home-made decorations. I hardly spent any money this year, tried to re-use whatever I could from previous years and somehow ended up with a completely different look (which was planned by the way). My only treat was a new bauble from Cameron House in Beeston ( which I thought was perfect for me with where I am right now with my life (not to mention that the bauble is just simply fab!). Click here to see even more beautiful Christmas baubles from Cameron House

We always let the kids choose their own bauble every year and they never fail to surprise me with something different. And so we welcomed a rustic reindeer and a wooden squirrel to our Christmas tree family! As well as a magical hummingbird chosen by Rob. I have to say he has a really good taste in Christmas baubles as his last year’s choice is still my favourite bauble ever (unlike his choices elsewhere in the house!)
Every year I add some home-made decorations too. Last year was all about stars (wood peg stars) and this year I’ve added snowflakes Only this time I’ve decided to be even more thrifty and spent absolutely nothing… niente, zero, nada! (although you may have to stock up on toilet paper for this). Literally all you need is toilet paper rolls and some wool (or that old jumper you never liked).

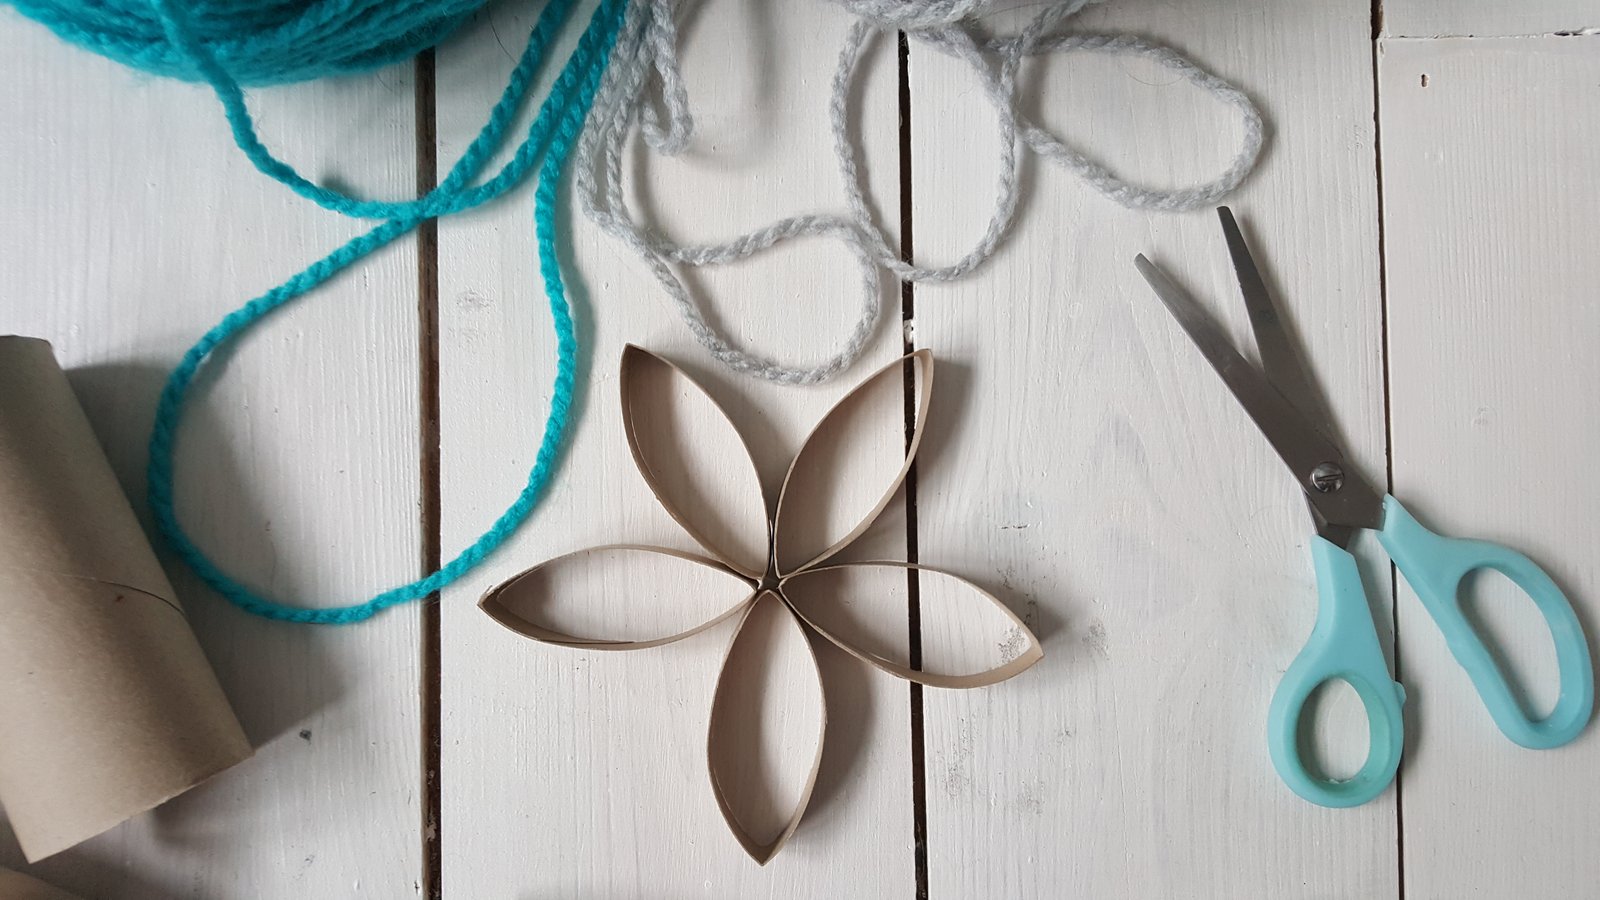
Cut the paper roll in half, then half again, and again until you have 8 equal pieces. Arrange five of them so that they meet in the middle and glue them together. The other three pieces cut in half and glue them in between the bigger pieces. You should end up with a snowflake shape like this:
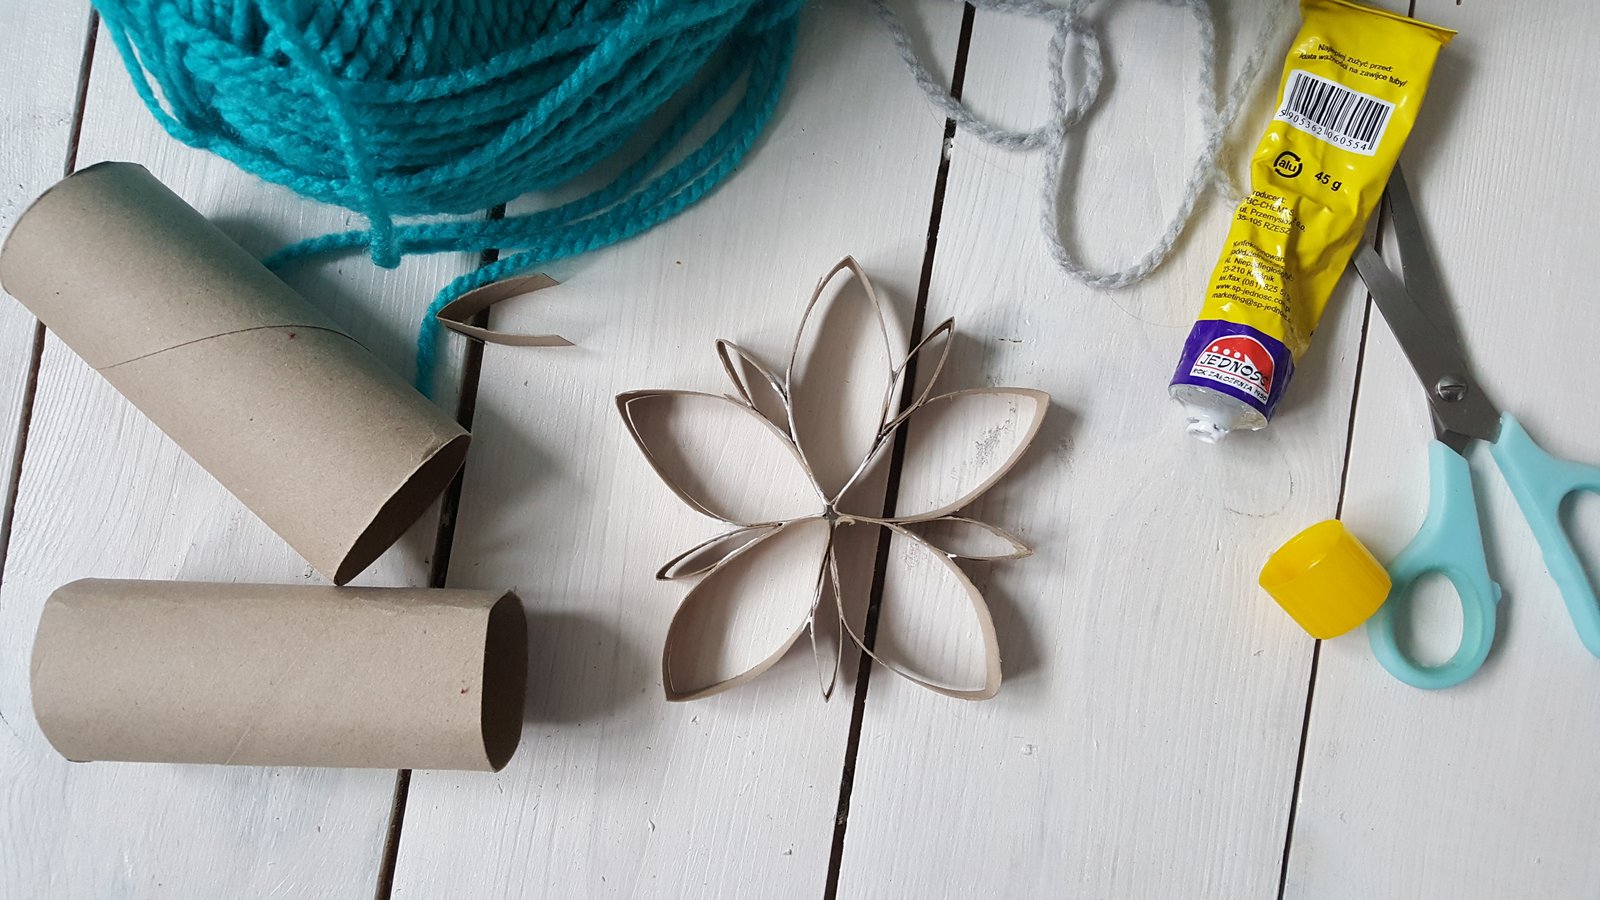
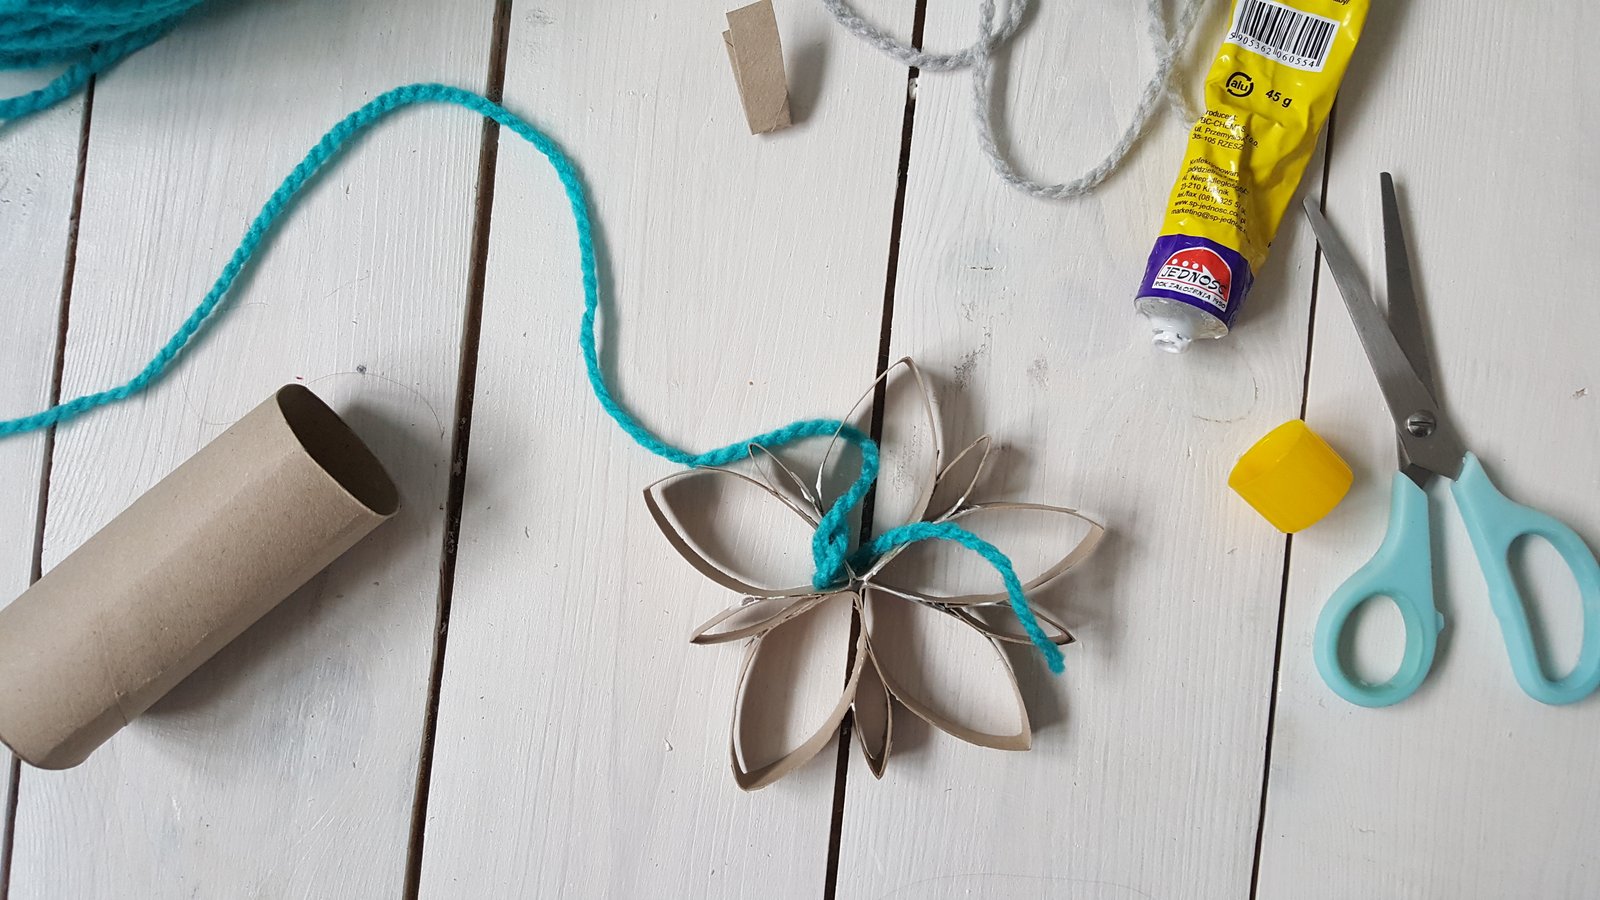
Wait until the glue has dried. And then the fiddly bit. Start wrapping the snowflake with the wool (always start in the middle). Going upwards wrap every piece closely, making sure it is not too loose but not too tight either. You don’t have to go all the way around with just one piece of wool, you can make cuts along the way. Just make sure that you tie the wool together very neatly, and don’t leave any visible knots. It should take you about 20-30 minutes to wrap the whole snowflake around (the thicker the wool, the quicker you’ll get through this). It may be a little bit time-consuming but if you (like me) tried and failed with the knitting (either I was doing something wrong or my fingers are too fat and stiff), you may be chuffed with yourself. With the end result like this I definitely am!!!
The Christmas tree look is complete! We have pom-pom’s (last year projects), animals, few baubles, wood peg stars (last year project again), woollen snowflakes and life motto to remind ourselves what Christmas (and not just Christmas) is all about!!!
My home-made project hasn’t ended there (of course!). Unfortunately I didn’t have time to photograph them all (had to squeeze in some Christmas shopping in between all that). So here’s just the end result of my DIY Christmas print, which took me about 5 minutes to make and (again) I just re-used what I already had in the house!
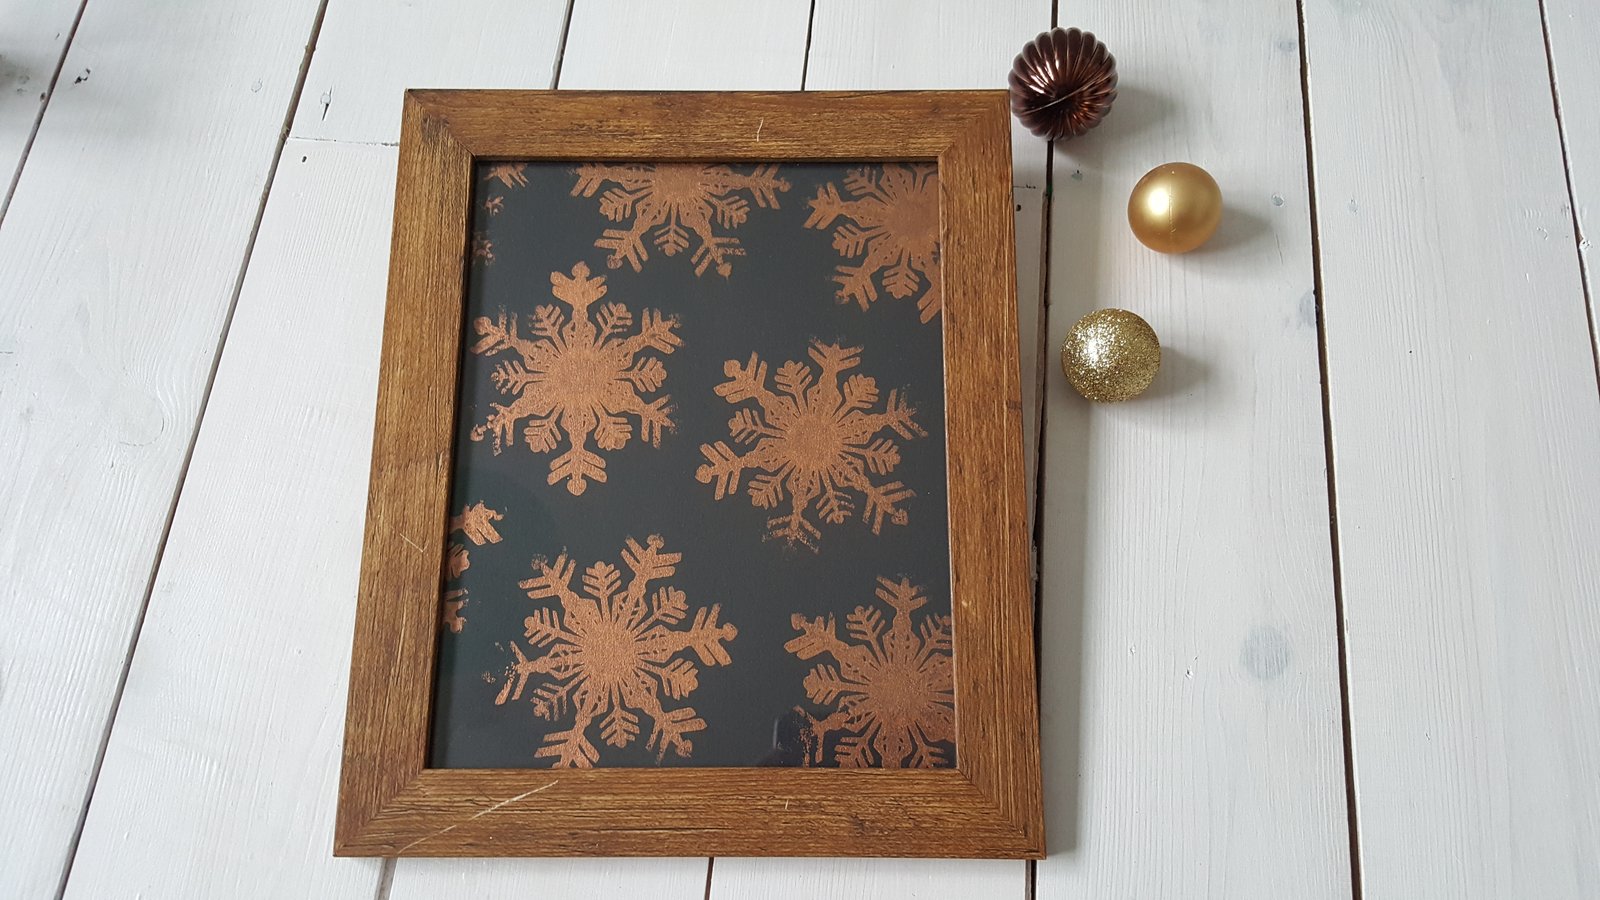
If you want to try to make one like this, you will need:
- a frame (any frame will do)
- piece of black card (cut to the frame size)
- anything you can use as a stamp (I used a Christmas decoration from last year which I later re-hung on the tree)
- gold spray paint
Just spray the “stamp” with the paint, press it onto the card, repeat few times until you’re happy with the arrangement. Wait till dry, frame it and ta dah…
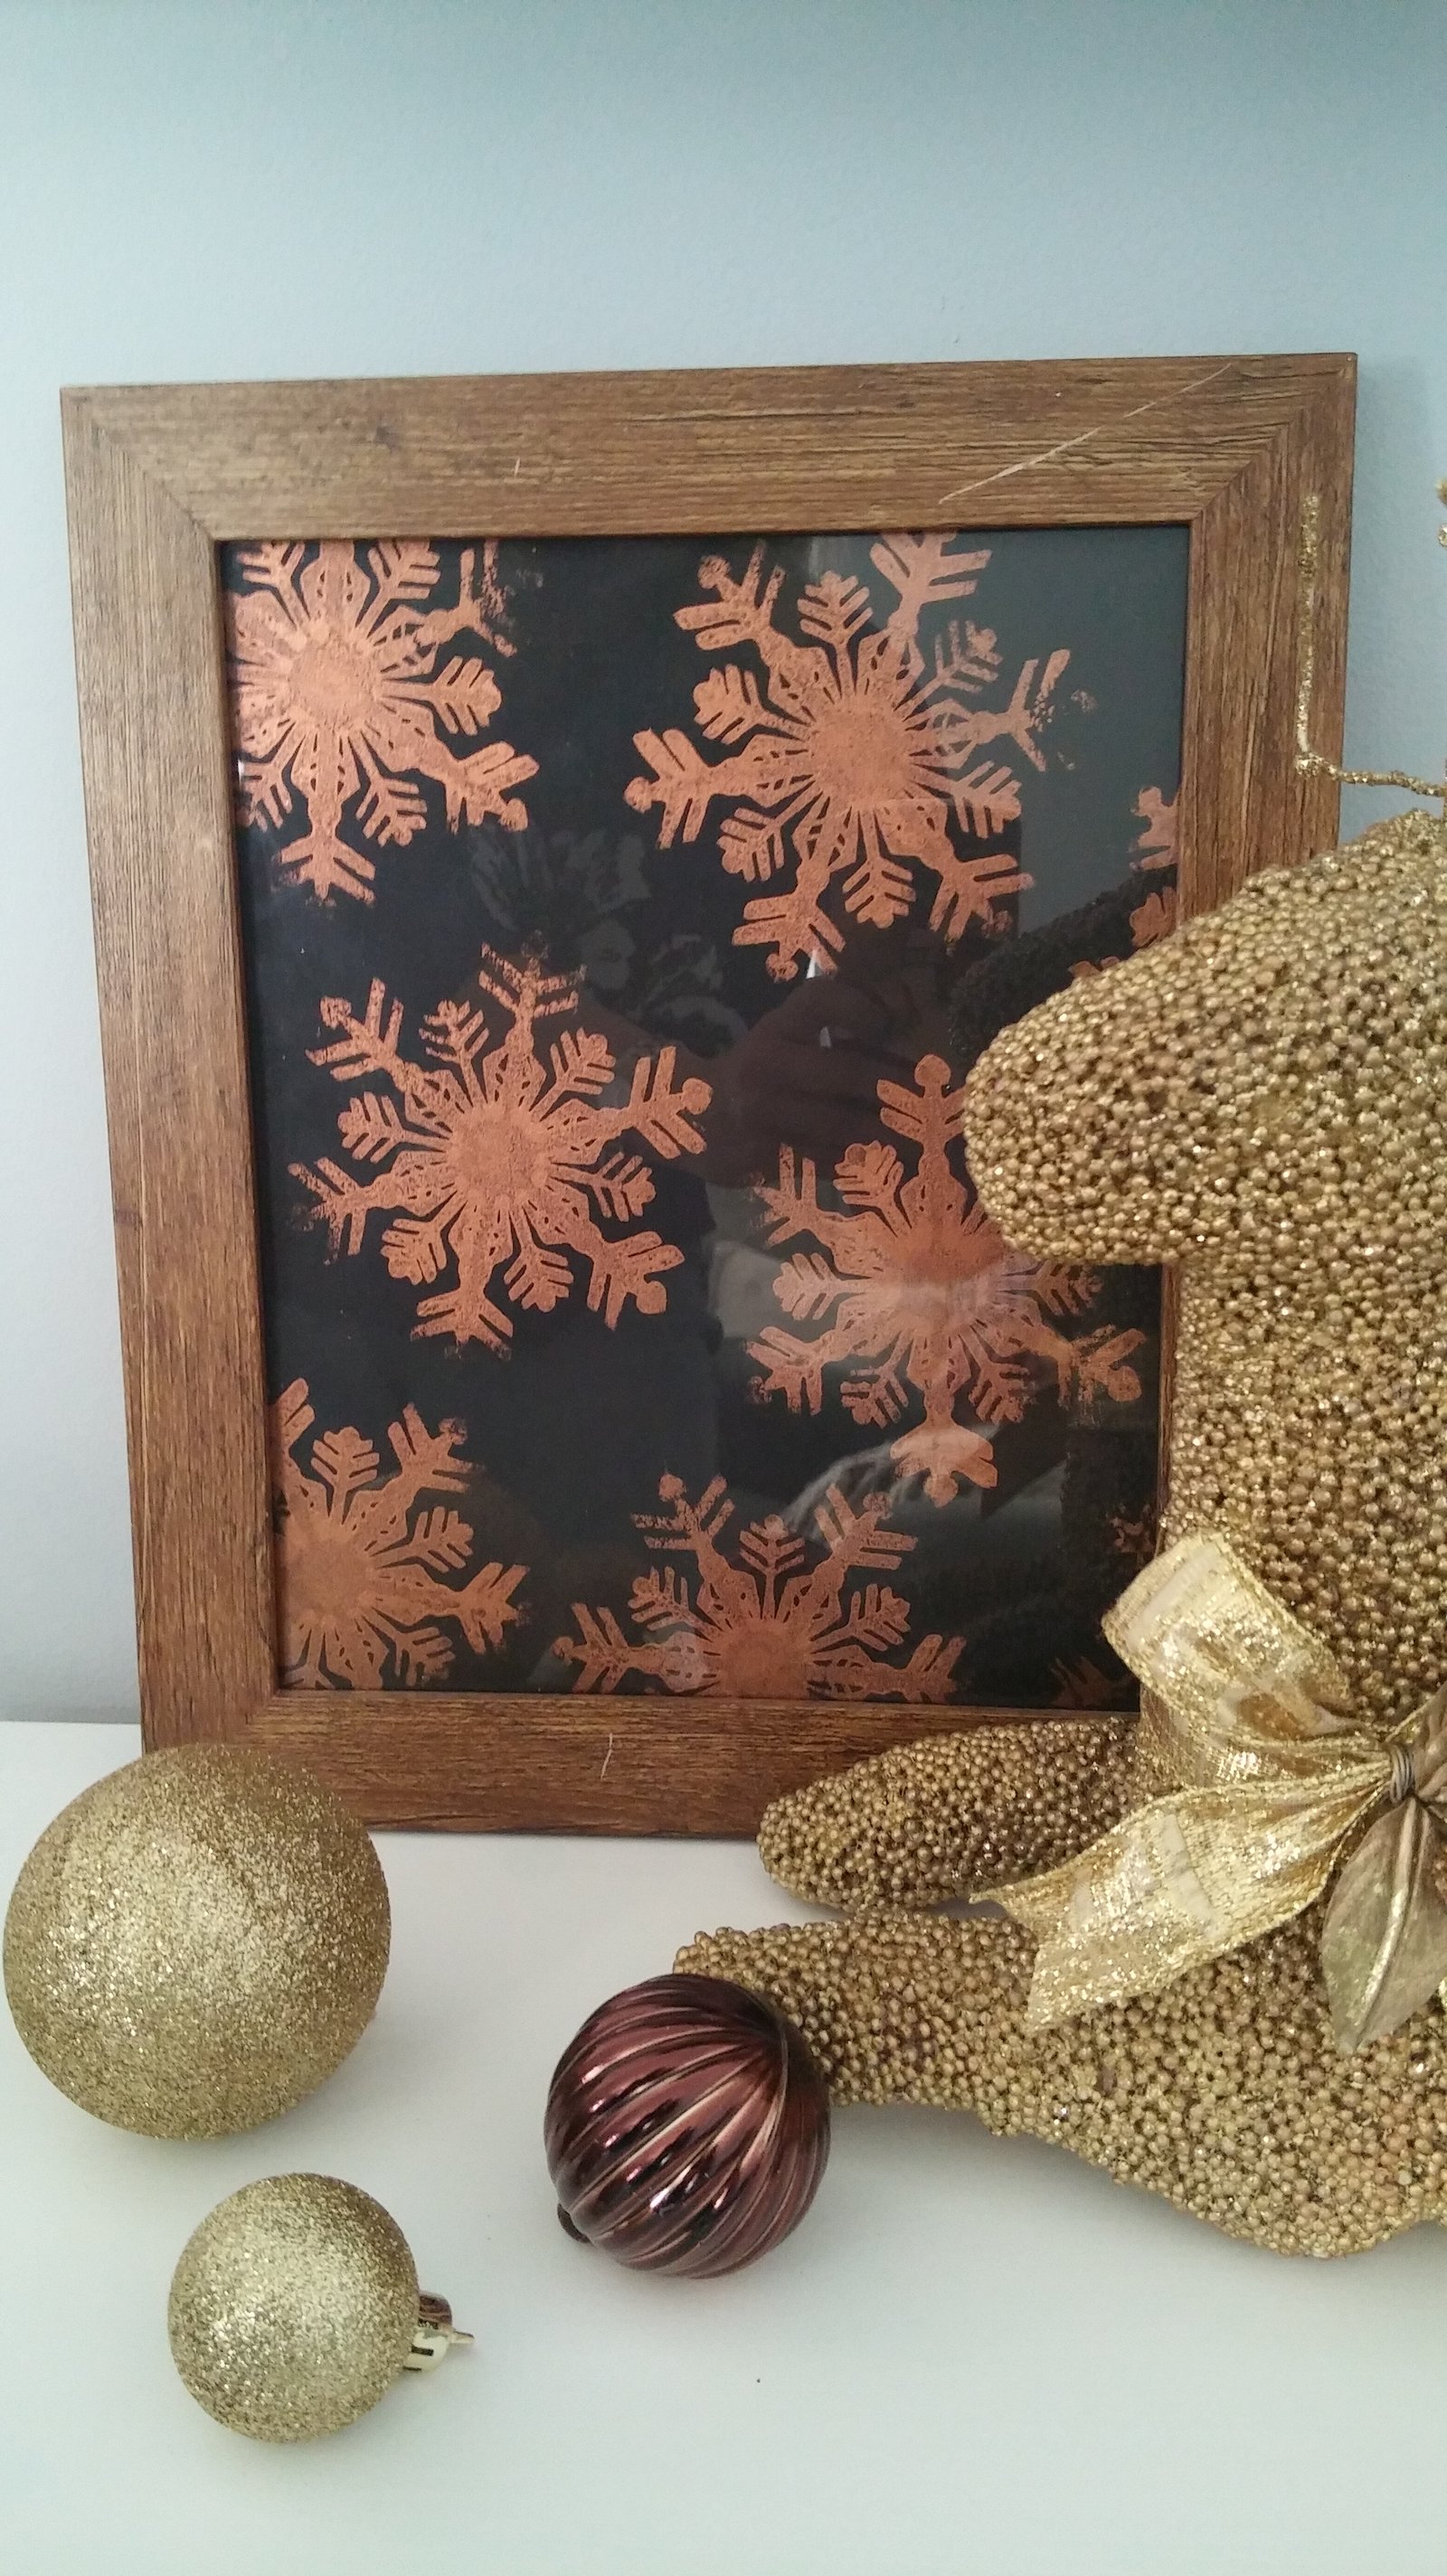
The last thing I just had to do to make the look of my living room complete was to decorate that empty hole in the wall/fire-place (I’m still hoping that my dream stove will be included in the Christmas sales). So because I had so many baubles from previous years that I don’t use any more (and I never throw thing away!) I decided to use them to decorate “the hole”. I placed some fairy lights at the bottom and then filled the fire place with all the Christmas baubles I had. That’s all! So simple! And it looks great!
And there’s few more decoration ideas from my painted house:
Now all that’s left to say is to wish you all Very Merry and Very Magical Christmas from Very Me Interiors!!!
Zapisz
Zapisz
Zapisz
Zapisz
Zapisz
Related News
0 Comments
Reply your comment Cancel Reply
This site uses Akismet to reduce spam. Learn how your comment data is processed.


Piotr
December 21, 2016“Literally” all I need this year for Christmas is … toilet paper roll, but with wool may it looks better 🙂 Merry Christmas Ann, Rob and kids!